[WizSched] Drag & Drop 보드 컴포넌트 - (2) Task Object 배열로 만들기
🍀목차
먼저, 단순한 형태인 string 배열로 이해해 보자
실제 데이터와 비슷하게 만들어보자
어디를 고쳐야 할까?
먼저, 단순한 형태인 string 배열로 이해해 보자
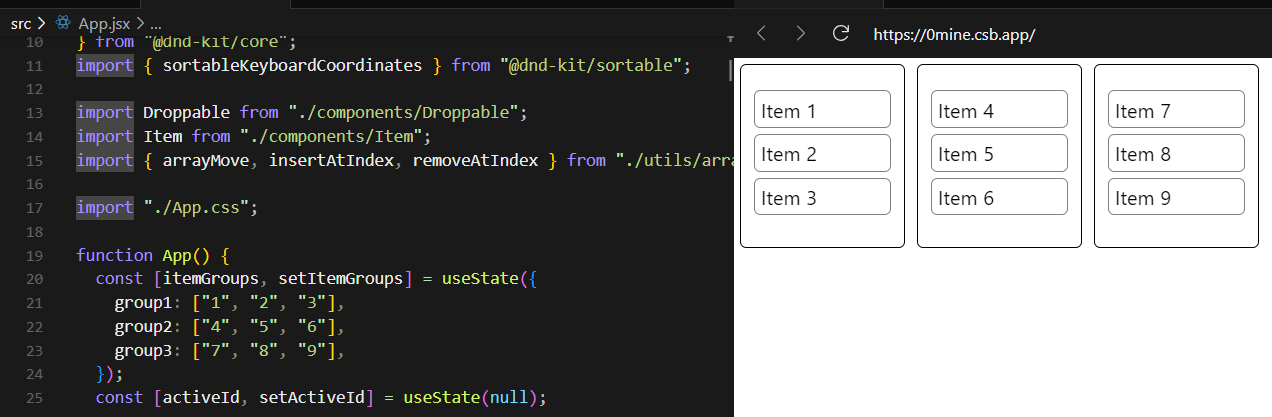
참고한 코드는 해당 codesandbox이다! 공식 문서 Sortable도 같이 보면 좋다.
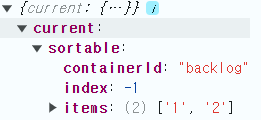
아래와 같은 형태, backlog에 있는 1이나 2를 드래그한다면 active.data.current.sortable안에서 데이터들을 확인할 수 있다.
 const [items, setItems] = useState({
    backlog: ['1', '2'],
    weekly: ['4', '5', '6'],
  });
DndContext에 전달하는 이벤트 핸들러는 직접 구현한다. codesandbox에서는 아래와 같이 구현했다.
- onDragStart는 드래그가 시작되었을 때, 현재 활성화된 active item id를 저장한다(Overlay 같은 미리 보기에 활용).
- onDragCancel은 드래그가 취소되었을 때, active item id를 초기화한다.
- onDragOver은 드래그 중, active 속성과 over 속성을 실시간으로 비교하는 로직을 추가한다.
- onDragEnd는 드래그가 끝났을 때, 새로운 item을 적용하는 로직을 추가한다.
<DndContext
      sensors={sensors}
      collisionDetection={closestCenter}
      onDragStart={handleDragStart}
      onDragCancel={handleDragCancel}
      onDragOver={handleDragOver}
      onDragEnd={handleDragEnd}
    >
    ...
handleDragOver부터 살펴보면, active와 over의 containerId를 알아낸 후, 다른 컨테이너로 이동한다면 active 정보와 over 정보를 moveBetweenContainers에 전달하여 만들어진 새 item을 반환한다.
const handleDragOver = (event: DragOverEvent) => {
    const { active, over } = event;
    const { id } = active;
    const overId = over?.id;

    if (!overId) {
      return;
    }

    const activeSortableData = active.data.current?.sortable;
    const overSortableData = over.data.current?.sortable;

    const activeContainer = activeSortableData.containerId;
    const overContainer = overSortableData.containerId || over.id;

    if (activeContainer !== overContainer) {
      setItems((items) => {
        const activeIndex = activeSortableData.index;
        const overIndex =
          over.id in items ? items[overContainer].length + 1 : overSortableData.index;

        return moveBetweenContainers(
          items,
          activeContainer,
          activeIndex,
          overContainer,
          overIndex,
          id,
        );
      });
    }
  };
handleDragEnd는 드래그 작업이 끝났을 때, 상태를 업데이트하는 로직을 추가한다. ArrayMove의 경우 아래와 같이 구현되어 있는 함수이다. 같은 컨테이너 내의 아이템 위치를 이동시키는 데 사용된다.
// https://github.com/clauderic/dnd-kit/blob/master/packages/sortable/src/utilities/arrayMove.ts

/**
 * Move an array item to a different position. Returns a new array with the item moved to the new position.
 */
export function arrayMove<T>(array: T[], from: number, to: number): T[] {
  const newArray = array.slice();
  newArray.splice(
    to < 0 ? newArray.length + to : to,
    0,
    newArray.splice(from, 1)[0]
  );

  return newArray;
}
const handleDragEnd = (event: DragEndEvent) => {
    const { active } = event;
    const { over } = event;

    if (!over) {
      setActiveId(null);
      return;
    }

    if (active.id !== over.id) {
      const activeSortableData = active.data.current?.sortable;
      const overSortableData = over.data.current?.sortable;

      const activeContainer = activeSortableData.containerId;
      const overContainer = overSortableData.containerId || over.id;

      const activeIndex = active.data.current.sortable.index;
      const overIndex = over.id in items ? items[overContainer].length + 1 : overSortableData.index;

      setItems((items) => {
        let newItems;
        if (activeContainer === overContainer) {
          newItems = {
            ...items,
            [overContainer]: arrayMove(items[overContainer], activeIndex, overIndex),
          };
        } else {
          newItems = moveBetweenContainers(
            items,
            activeContainer,
            activeIndex,
            overContainer,
            overIndex,
            active.id,
          );
        }

        return newItems;
      });
    }

    setActiveId(null);
  };
moveBetweenContainers도 직접 작성한다. 참고한 codesandbox에서는 activeIndex와 overIndex를 활용해서 slice로 끼워 넣는다.
const moveBetweenContainers = (
    items,
    activeContainer,
    activeIndex,
    overContainer,
    overIndex,
    item,
  ) => {
    return {
      ...items,
      [activeContainer]: [
        ...items[activeContainer].slice(0, activeIndex),
        ...items[activeContainer].slice(activeIndex + 1),
      ],
      [overContainer]: [
        ...items[overContainer].slice(0, overIndex),
        item,
        ...items[overContainer].slice(overIndex),
      ],
    };
  };
이렇게 가장 간단한 예시를 이해해 보았다.
실제 데이터와 비슷하게 만들어보자
내 프로젝트는 구글 캘린더의 이벤트를 활용하며, 그렇기에 string 형태의 item 배열을 객체 배열로 바꿔줄 필요가 있었다. 실제 데이터와 비슷한 목업 데이터를 만들고 그에 맞게 로직을 변경해 보자.

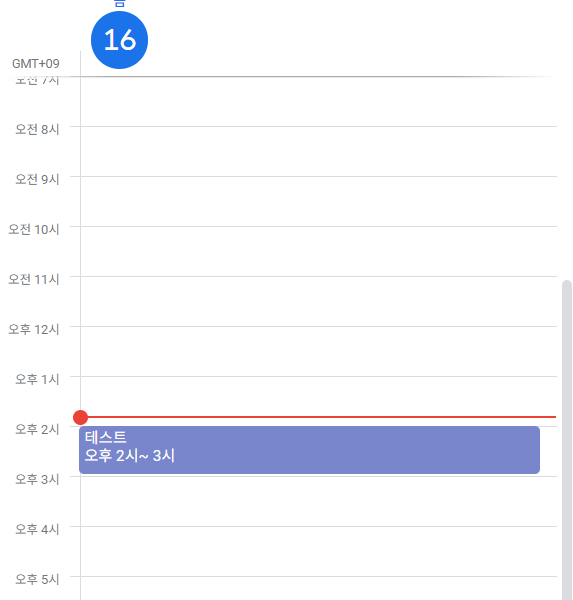
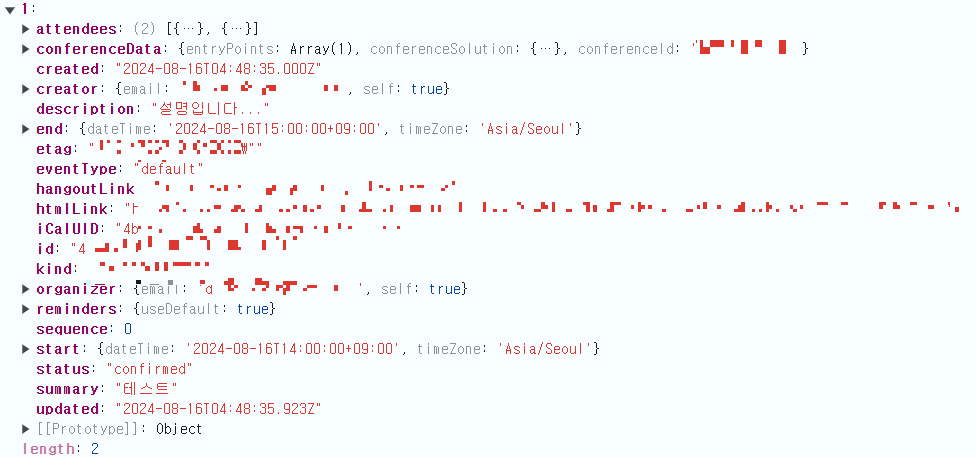
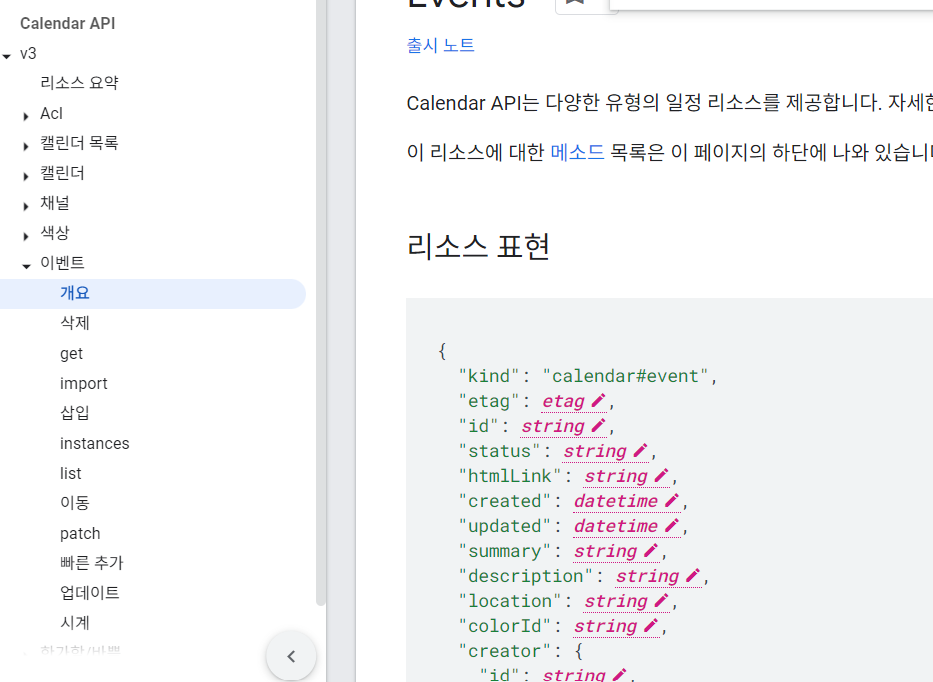
캘린더 API 문서를 확인하면 해당 구조와 동일한 것을 볼 수 있다. 해당 구조를 그대로 우선 필요한 속성들을 뽑아 목업 데이터를 만들어보자(DefinitelyTyped에 있는 구글 캘린더 Type을 이용하여 Type을 정의함(TaskContainerType)).
const [items, setItems] = useState<ContainerType>({
    backlog: [
      {
        kind: 'calendar#event',
        summary: '테스트',
        description: '설명입니다...',
        created: '2024-08-16T04:48:35.000Z',
        etag: '1234567890',
        id: 'asdfasdfasdf',
        sequence: 0,
        start: { dateTime: '2024-08-16T14:00:00+09:00', timeZone: 'Asia/Seoul' },
        end: { dateTime: '2024-08-16T15:00:00+09:00', timeZone: 'Asia/Seoul' },
      },
      {
        kind: 'calendar#event',
        summary: '진돗개',
        description: '멍멍 왈왈 짖습니다.',
        created: '2024-08-16T04:48:35.000Z',
        etag: '1233333333',
        id: 'sdgggsdgg',
        sequence: 1,
        start: { dateTime: '2024-08-16T14:00:00+09:00', timeZone: 'Asia/Seoul' },
        end: { dateTime: '2024-08-16T15:00:00+09:00', timeZone: 'Asia/Seoul' },
      },
      {
        kind: 'calendar#event',
        summary: '고냥이',
        description: '냥냥 짖을까요...',
        created: '2024-08-16T04:48:35.000Z',
        etag: '677788877',
        id: 'sgggggg',
        sequence: 2,
        start: { dateTime: '2024-08-16T14:00:00+09:00', timeZone: 'Asia/Seoul' },
        end: { dateTime: '2024-08-16T15:00:00+09:00', timeZone: 'Asia/Seoul' },
      },
    ],
    weekly: [
      {
        kind: 'calendar#event',
        summary: '영구',
        description: '아마 짖지 않습니다... ',
        created: '2024-08-16T04:48:35.000Z',
        etag: '1234455566890',
        id: 'asdffgesdfffsdf',
        sequence: 3,
        start: { dateTime: '2024-08-16T14:00:00+09:00', timeZone: 'Asia/Seoul' },
        end: { dateTime: '2024-08-16T15:00:00+09:00', timeZone: 'Asia/Seoul' },
      },
    ],
  });
어디를 고쳐야 할까?
기존의 moveBetweenContainers에 전달하는 마지막 파라미터의 경우, active item자체가 id기에 문제가 없었지만, 객체 배열로 바뀐 지금은 id에 그저 active item의 id 속성 값만 들어있다. 실제 active 된 객체를 넣어주어야 하고, 이는 activeContainer-activeIndex로 접근시켜 전달하면 된다.

index를 찾는 부분도 중요한 부분이다. 기존에는 item 자체가 id였지만 현재는 id값을 통해 index값을 얻으려면 배열을 순회하여 해당 id값을 가진 배열 index를 직접 찾아주어야 한다. 나는 findIndex를 사용해 주었다. -1이라면 해당 index가 active나 over에 존재하지 않는 것이므로 0으로 초기화해 준다.

Obejct 배열로 변경된 Task들이 잘 이동하는 것을 볼 수 있다.
블로그로 정리하니 헤매지 않은 것 같지만 실상은... ㄱ- 생각보다 어려웠다. 디자인도 바로 바꿔주고 싶었지만 시간이 좀 걸릴 것 같다. 해당 티스토리 게시글 도움을 많이 받았다. 중요한 정보를 알차게 정리해 주셨다🤩.
참고자료
https://docs.dndkit.com/presets/sortable
https://developers.google.com/calendar/api/v3/reference/events?hl=ko
https://github.com/DefinitelyTyped/DefinitelyTyped
https://josiah0208.tistory.com/7
https://codesandbox.io/s/dnd-kit-multi-containers-lknfe?file=/src/app.js