-
[WizSched] Google Calendar API 테스트Front-End/Project 2024. 2. 7. 11:14
🍀 목차
Axios 설치
설정
테스트메인 페이지의 캘린더 섹션에서는 현재 사용자의 월(月:Month) 캘린더를 보여주도록 기획했다. 이번 글에서는 Axios를 사용해서 Google Calendar API를 테스트해 보고 데이터가 성공적으로 넘어오는지 확인해 본다.
Axios 설치
Google Calendar API와 통신하기 위해 HTTP 통신 라이브러리인
axios를 설치한다. Promise 기반의 HTTP 클라이언트로 다양한 브라우저(Fetch와 달리 IE도 지원)를 지원한다. axios 추가 라이브러리를 설치해야 한다.npm install axios yarn add axiosfetch(resource) fetch(resource, options) // options -> method, headers, body, modecredentials, cache, redirect, referrer 등...POST method(예시) 요청 시
Fetch API는 options 파라미터로 요청 메서드를 작성하여 통신한다.Axios의 경우는 아래와 같이 메서드를 제공하기에 보다 직관적이다.
axios.post('/user', { ... });

// cf. fetch
fetch('/users', { method: 'POST', ...});
Fetch는 응답 데이터를 JSON으로 변환해주어야 하는 것도 꽤 번거롭다. 요청 후 Response 인터페이스의 응답 스트림이 완료될 때까지 읽기 위해서 JSON 메서드를 사용해주어야 한다. 그러면 JSON으로 파싱한 결과와 함께 확인되는 Promise를 반환한다.
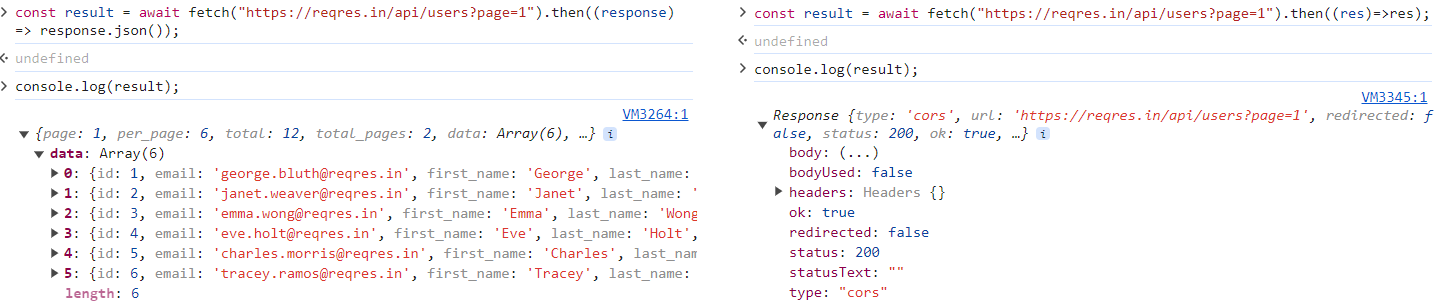
JSON으로 파싱해 준 왼쪽 코드와 응답을 그대로 전달한 오른쪽의 차이를 중점으로 확인해보자. Axios는 이 부분을 자동으로 파싱해주기에 응답 데이터를 직접 JSON으로 변환해 줄 필요가 없다.
const result = await axios.get('https://reqres.in/api/users?page=1');
별도로 파싱해주지 않아도 된다. 또한, axios는 then 또는 catch로 처리되기 전에 요청과 응답을 가로챌 수 있는
Interceptor(인터셉터)기능을 제공한다.이 기능은 아래와 같은 상황에 사용될 수 있다.
- 모든 요청에 토큰을 추가하거나 응답의 토큰을 추출하여 저장하는 등의 인증관리
- 모든 요청이나 응답에 공통적으로 수행해야 하는 작업 처리(요청 데이터의 전처리, 응답 데이터의 후처리)
- 모든 요청과 응답에 대한 에러 처리를 관리한다. 네트워크 에러, HTTP 상태 코드 에러 등을 처리.
- 모든 요청과 응답에 대한 로깅 수행. 정보를 기록하고 디버깅에 도움이 되는 정보를 수집한다.
- 요청이나 응답을 캐싱하는 등의 관련 작업 처리
- 등등...
// 요청 인터셉터 추가하기
axios.interceptors.request.use(function (config) {
	// 요청이 전달되기 전에 작업 수행
    return config;
}, function (error) {
	// 요청 오류가 있는 작업 수행
    return Promise.reject(error);
});


// 응답 인터셉터 추가하기
axios.interceptors.response.use(function (response) {
	// 2xx 범위에 있는 상태 코드(성공)는 이 함수를 트리거 한다.
    // 응답 데이터가 있는 작업 수행
    return response;
 }, function (error) {
 	return Promise.reject(error);
 });
필요할 때 인터셉터를 제거할 수도 있고, 커스텀 인스턴스에도 인터셉터를 추가할 수 있다.
그에 비해, Fetch API는 직접 인터셉터를 구현해야 한다. 훅을 만들거나, fetch 함수를 래핑 하여 요청과 응답을 가로채어 처리하는 함수를 추가하거나... 이 부분에 있어서 axios가 큰 장점이 있다고 느껴져 적용하게 되었다.
설정
문서를 참고하면 Request Config의 구성 옵션에 대해 나와있다. 몇 개를 발췌했다.
// Request Config { // 요청에 사용될 URL url: '/user', // 요청할 때 사용할 요청 메서드 method: 'get', // default // 절대값이 아닌 경우 url앞에 baseURL이 추가된다. baseURL: 'https://some-domain.com/api/', // `transformRequest` 는 서버로 전송되기 전 요청 데이터를 변경할 수 있다. // put, post, patch, delete에만 적용 가능하다. // 배열의 마지막 함수는 Buffer, ArrayBuffer, FormData 또는 Stream 인스턴스 또는 문자열을 반환해야 한다. // header 객체를 수정할 수도 있다. transformRequest: [function (data, headers) { // 데이터를 변환하려는 작업 수행 // return JSON.stringify(data);를 할 수도 있고...?! return data; }], // `transformResponse` 는 응답 데이터가 then/catch로 전달되기 전에 변경할 수 있게 해준다. transformResponse: [function (data) { return data; }], // `headers` 사용자 지정 헤더. headers: {'X-Requested-With': 'XMLHttpRequest'}, // `params` 객체 형태(일반 객체, URLSearchParams)로 된 // 요청과 함께 전송되는 URL 파라미터. // 참고 : null이나 undefined는 URL에 렌더링되지 않는다! params: { ID: 12345 }, // `paramsSerializer` : `params`의 직렬화를 담당하는 옵션 함수. // http://api.jquery.com/jquery.param/ 를 확인해보자. paramsSerializer: { //Custom encoder function which sends key/value pairs in an iterative fashion. encode?: (param: string): string => { /* Do custom operations here and return transformed string */ }, // Custom serializer function for the entire parameter. Allows user to mimic pre 1.x behaviour. serialize?: (params: Record<string, any>, options?: ParamsSerializerOptions ), //Configuration for formatting array indexes in the params. indexes: false // Three available options: (1) indexes: null (leads to no brackets), (2) (default) indexes: false (leads to empty brackets), (3) indexes: true (leads to brackets with indexes). }, // `data` 요청 바디로 전송될 데이터. // put, post, patch, delete 메서드만 적용 가능. // `transformRequest` 가 설정되지 않은 경우 다음 타입 중 하나여야 한다. // - string, plain object, ArrayBuffer, ArrayBufferView, URLSearchParams // - Browser only: FormData, File, Blob // - Node only: Stream, Buffer, FormData (form-data package) data: { firstName: 'Fred' }, // 바디로 전송하는 데이터의 대안 문법 // method post // 키가 아닌 값만 전송된다. data: 'Country=Brasil&City=Belo Horizonte', // `timeout` 요청이 시간 초괴되기 전의 시간(ms) 지정. // 요청이 `timeout`보다 오래 걸리면 중단된다. timeout: 1000, // default is `0` (no timeout) // `withCredentials` 자격 증명을 사용하여 사이트 간 액세스 제어 요청을 해야 하는지 여부. withCredentials: false, // default // `adapter` 커스텀 핸들링 요청을 처리할 수 있다. 테스트에 유용하다. // 유효한 Promise 응답을 반환해야 한다. (see lib/adapters/README.md). adapter: function (config) { /* ... */ }, // `auth` HTTP Basic 인증이 사용되며, 자격 증명을 제공한다. // `Authorization` 헤더가 설정되어 `headers`를 사용하여 // 설정한 기존의 `Authorization` 사용자 지정 헤더를 덮어쓴다. // 이 파라미터를 통해 HTTP Basic 인증만 구성할 수 있음을 알아야 한다. // Bearer 토큰 등의 경우 `Authorization` 사용자 지정 헤더를 대신 사용한다. auth: { username: 'janedoe', password: 's00pers3cret' }, // `responseType` 서버에서 받는 데이터의 타입. // options are: 'arraybuffer', 'document', 'json', 'text', 'stream' // browser only: 'blob' responseType: 'json', // default // `responseEncoding` 응답 디토킫에 사용할 인코딩. (Node.js only) // Note: Ignored for `responseType` of 'stream' or client-side requests responseEncoding: 'utf8', // default // `xsrfCookieName` xsrf token 값으로 사용할 쿠키의 이름. xsrfCookieName: 'XSRF-TOKEN', // default // `xsrfHeaderName` xsrf token 값을 운반하는 HTTP 헤더 이름 xsrfHeaderName: 'X-XSRF-TOKEN', // default // `undefined` (default) - set XSRF header only for the same origin requests withXSRFToken: boolean | undefined | ((config: InternalAxiosRequestConfig) => boolean | undefined), // `onUploadProgress` 업로드 진행 이벤트 처리 // browser & node.js onUploadProgress: function ({loaded, total, progress, bytes, estimated, rate, upload = true}) { // 업로드 진행 이벤트 작업 수행 }, // `onDownloadProgress` 다운로드 진행 이벤트 처리 // browser & node.js onDownloadProgress: function ({loaded, total, progress, bytes, estimated, rate, download = true}) { // 다운로드 진행 이벤트 작업 수행 }, // `maxContentLength` node.js에서 허용되는 HTTP 응답 콘텐츠의 최대 크기를 바이트 단위로 정의. maxContentLength: 2000, // `maxBodyLength` (Node only option) HTTP 요청 콘텐츠의 최대 크기를 바이트 단위로. maxBodyLength: 2000, // `validateStatus` 는 지정된 HTTP 응답 상태 코드에 대한 Promise를 이행할지 또는 거부할지 결정. // 만약 `validateStatus` true? 이행. 그렇지 않으면, Promise 거부. validateStatus: function (status) { return status >= 200 && status < 300; // default }, // `maxRedirects` node.js에서 리디렉션 최대값을 정의한다. // 0일경우 리디렉션 되지 않음. maxRedirects: 21, // default // `beforeRedirect` defines a function that will be called before redirect. // Use this to adjust the request options upon redirecting, // to inspect the latest response headers, // or to cancel the request by throwing an error // If maxRedirects is set to 0, `beforeRedirect` is not used. beforeRedirect: (options, { headers }) => { if (options.hostname === "example.com") { options.auth = "user:password"; } }, // `httpAgent`, `httpsAgent` 는 각각 node.js에서 HTTP 및 HTTPS 요청을 수행할 때 사용할 // 사용자 지정 에이전트를 정의한다. 기본적으로 활성화되지 않은 `keepAlive`와 같은 옵션 추가 가능. httpAgent: new http.Agent({ keepAlive: true }), httpsAgent: new https.Agent({ keepAlive: true }), // `cancelToken` specifies a cancel token that can be used to cancel the request // (see Cancellation section below for details) cancelToken: new CancelToken(function (cancel) { }), // an alternative way to cancel Axios requests using AbortController signal: new AbortController().signal, env: { // The FormData class to be used to automatically serialize the payload into a FormData object FormData: window?.FormData || global?.FormData }, formSerializer: { visitor: (value, key, path, helpers) => {}; // custom visitor function to serialize form values dots: boolean; // use dots instead of brackets format metaTokens: boolean; // keep special endings like {} in parameter key indexes: boolean; // array indexes format null - no brackets, false - empty brackets, true - brackets with indexes }, }axios.create로 인스턴스를 만들 때 기본 구성을 작성하여 전달한다. 해당 인스턴스의 모든 요청에 적용된다.baseURL,headers의 Authorization 등 설정을 해줬다. (+ 인스턴스의 메시드 요청 시에 해당 요청에만 필요한 특정 구성을 전달할 수도 있다.)기본 구성
const instanceConfig: CreateAxiosDefaults = { baseURL: 'https://~~~', headers: { 'Content-Type': 'application/json', }, };- baseURL: API의 baseURL을 넣어준다.
- headers의 Content-Type: 서버로 전송되는 데이터 형식을 명시한다.
하나 더 넣어줘야 할 정보가 있는데 그건 Authorization이다.
Authorization: 'Bearer ${access_token}',- headers의 Authorization: 요청 헤더 Authorization는
<type> <credentials>형식으로 들어가는데, OAuth의 경우는 토큰 기반의 인증이고, Bearer Scheme을 쓴다. credentials에는 인증 서버에서 받은 Acess Token을 넣어준다. 사용할 API의 요청 형식을 확인해 보자. 필요하다면 넣어서 요청해야 한다.
사용할 API를 참조하자(대부분 필요하긴 하다). 로그인한 유저의 요청에는 인증 정보를 추가하도록 인터셉터를 사용해 봤다.
// 예시
instance.interceptors.request.use(
  (config: InternalAxiosRequestConfig) => {
    const data = localStorage.getItem('token 저장소 key');
    const accessToken = JSON.parse(data)['provider_token'];

    if (accessToken) {
      config.headers.Authorization = `Bearer ${accessToken}`;
    }

    return config;
  },
  (error: AxiosError) => {
    const { status, message } = error;
    return Promise.reject(error);
  },
);
테스트
await supabase.auth.signInWithOAuth({
	provider: 'google',
	options: {
    	scopes: 'https://www.googleapis.com/auth/calendar',
       	queryParams: {
        	access_type: 'offline',
            prompt: 'consent',
        },
      },
 });
우리가 사용할 scopes를 supabase
signInWithOAuth메서드의options파라미터에 추가해 준다.
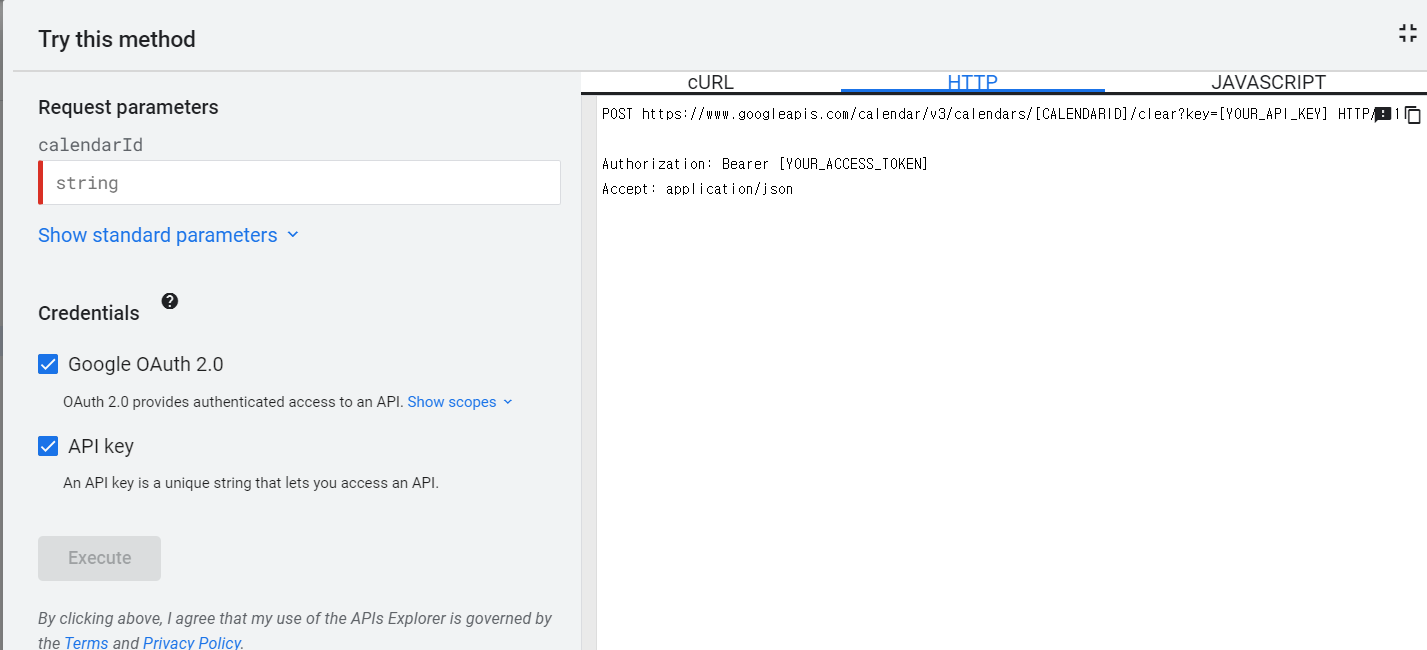
API 페이지에서 캘린더의 id를 확인할 수 있다. 
2024년 2월 캘린더 내용들 현재 캘린더에는 2월 "대전" 이벤트가 존재한다.

timeMin은 테스트로 1월을 주었다. timeMin에 필터링 기준으로 사용할 이벤트 종료 시간의 하한값(제외)를 넣어준다. 값은datetime이다(예시 2011-06-03T10:00:00-07:00).
페이지에서 테스트. API 페이지에서 잘 되는지 테스트해본다. 대전 이벤트가 존재한다.
const response = await instance.get(`/calendars/${calendarId}/events`, {
    params: {
      timeMin: '2024-01-01T10:00:00-07:00',
    },
  });

// 기본 설정 캘린더를 보려면
const response = await instance.get('/calendars/primary/events', {
    params: {
      timeMin: '2024-01-01T10:00:00-07:00',
    },
  });
아까 위에서 알아낸 calendarId로 요청해도 되고, 기본 설정 캘린더를 보려면 primary를 넣어 요청하면 된다.

잘 받아와 진다!
참고자료
https://developer.mozilla.org/ko/docs/Web/API/Fetch_API/Using_Fetch
https://developers.google.com/calendar?hl=ko